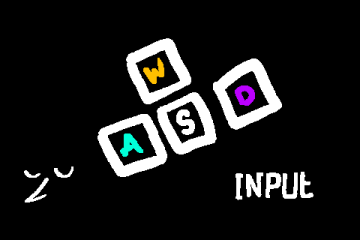
Input System - binding, input buffering, and controller support

What? Why?! I worked really hard on it!
"I couldn't even move around! I was mashing the WASD keys like crazy and nothing happened!"
Oh, well, actually my game uses the arrow keys...
"That's stupid! I even tried using a controller, but it wouldn't respond to that either!"
I, uh, I didn't add controller support...
"Lame! I'm giving you a 1 in stability for bad controls. And a 1 in immersion for good measure!"
Hi there. Has this ever happened to you? Maybe not, but maybe you're worried that it's going to happen. Adding all kinds of input support sure can be annoying, can't it? You gotta make sure multiple keys can do the same thing, you need controllers to work, maybe you even need to add input buffering so that little Johnny doesn't rage quit when he taps the spacebar a frame too early.
Do you want a unified system that can handle all of your input related needs? Me too! But until we find that, here's an input system that handles some of the more common requirements.
This system contains:
- Support for binding actions to multiple keys
- For example, making arrow keys and WASD work interchangeably
- Treating gamepads the same as keyboard input, including joysticks
- This system treats joysticks like a button press, so you won't get tilt data (meaning no "half presses" by slightly tilting the stick)
- Other systems can blend tilt data and keyboard input, but we're gonna focus on fundamentals
- Handling input buffering
- For example, pressing the jump button a couple frames before landing and still jumping
- Input "stuttering"
- Holding a key and having it perform its action multiple times with a short delay between
- Commonly found in things like navigating menus and typing text (try holding a letter down in a text editor)
IMPORTANT NOTE: All variables and methods marked with a __ at the start are "private" and not to be modified or called by the user. These are internal values that only the system itself should use. Variables not marked with __ are "public" and can be called or edited by you!
First, let's start with the input manager. The manager's job is to hold all of our different inputs together, track which controller we want to check, and update our inputs each frame.
Let's make a script, input, and place this constructor in it:
function InputManager(_gamepad = 0, _deadzone = 0.4) constructor {
    __inputs = []; // total inputs
    gamepad = _gamepad; // gamepad number
    deadzone = _deadzone; // gamepad axis deadzone
    buffer = 5; // how many frames of wiggle room buffered checks get

    // Call in step to update manager
    run = function() {
        var len = array_length(__inputs);
        for (var i = 0; i < len; i++)
            __inputs[i].__update();
    }

    create_input = function() {
        var _input = new Input(self);
        array_push(__inputs, _input);
        return _input;
    }
}
Our manager has three public variables:
gamepad - which gamepad to get input from (default is 0)
deadzone - how far a joystick needs to be tilted to count as "pressed". Personally I set my deadzone higher than usual because my tilt inputs, being the same as full keyboard inputs, need to be rather accentuated. Feel free to change that to your liking.
buffer - how many frames a buffered check is true for (bigger number = more buffering)
And it has two public method:
run - call this in your object's step event to update your inputs
create_input - make a new input for our system to use
So, let's say our player object wants to use our input manager. To do so, it would create a new manager in its create event:
/// Create Event
inputManager = new InputManager();
And then it would run the input manager in the Begin Step event. We use the Begin Step instead of the step to make sure our inputs are updated before we try to read from them:
/// Begin Step Event
inputManager.run();
And that's it! We're ready to start adding some inputs!
enum INPUT_AXIS {
    right,
    up,
    left,
    down
}

function Input(_manager) constructor {
    __manager = _manager;
    __time = 0;
    __keys = [];

    // Called by input manager's run method
    __update = function() {
        var active = false;

        var len = array_length(__keys);
        for (var i = 0; i < len; i++) {
            if (__keys[i].check()) {
                active = true;
                break;
            }
        }

        if (active)
            __time++;
        else if (__time > 0)
            __time = -__manager.buffer;
        else
            __time = min(__time + 1, 0);
    }

    add_keyboard_key = function(_key) {
        var key = {
            button: _key,
            check: function() {
                return keyboard_check(button);
            }
        };

        array_push(__keys, key);
        return self;
    }

    add_gamepad_button = function(_button) {
        var key = {
            creator: other,
            button: _button,
            check: function() {
                return gamepad_button_check(creator.__manager.gamepad, button);
            }
        };

        array_push(__keys, key);
        return self;
    }

    add_gamepad_left_stick = function(_direction) {
        var key = {
            creator: other,
            axis: _direction == INPUT_AXIS.right || _direction == INPUT_AXIS.left ?
                gp_axislh :
                gp_axislv,
            dir: _direction == INPUT_AXIS.right || _direction == INPUT_AXIS.down ?
                1 :
                -1,
            check: function() {
                return gamepad_axis_value(creator.__manager.gamepad, axis) * dir >= creator.__manager.deadzone;
            }
        }

        array_push(__keys, key);
        return self;
    }

    add_gamepad_right_stick = function(_direction) {
        var key = {
            creator: other,
            axis: _direction == INPUT_AXIS.right || _direction == INPUT_AXIS.left ?
                gp_axisrh :
                gp_axisrv,
            dir: _direction == INPUT_AXIS.right || _direction == INPUT_AXIS.down ?
                1 :
                -1,
            check: function() {
                return gamepad_axis_value(creator.__manager.gamepad, axis) * dir >= creator.__manager.deadzone;
            }
        }

        array_push(__keys, key);
        return self;
    }

    // Check for a hold
    check = function() {
        return __time > 0;
    }

    // Check for a press
    check_pressed = function(_buffered = false) {
        if (_buffered)
               return __time > 0 && __time <= __manager.buffer;
        return __time == 1;
    }

    // Check for a release
    check_released = function(_buffered = false) {
        if (_buffered)
            return __time < 0;
        return __time == -__manager.buffer;
    }

    // Check for sporadic presses over intervals of time
    check_stutter = function(_initial_delay, _interval) {
        if (__time == 1)
            return true;

        return __time - _initial_delay > 0 && (__time - _initial_delay) % _interval == 0;
    }

    // Sets input to a state that a buffered press check does not find true
    fully_press = function() {
        __time = __manager.buffer + 1;
    }

    // Sets input to a state that a buffered release check does not find true
    fully_release = function() {
        __time = 0;
    }
}
There are no public variables, but there are several public methods. Note that there are three types of method- ones that start with add, ones that start with check, and ones that start with fully.
The add methods are used to add keybinds to our input. These methods can be chained to add many inputs!
add_keyboard_key - add a keyboard key
add_gamepad_button - add a gamepad button
add_gamepad_left_stick - add a gamepad left joystick tilt (use the INPUT_AXIS enum!)
add_gamepad_right_stick - add a gamepad right joystick tilt (use the INPUT_AXIS enum!)
The check methods can be used to read from our input.
check - call this like you would call keyboard_check, but it works for all our inputs!
check_pressed - call this like keyboard_check_pressed. Pass true for a buffered check.
check_released - call this like keyboard_check_released. Pass true for a buffered check.
check_stutter - used for stuttered inputs over time
The fully methods are used along with buffered checks:
fully_press - call this to make an input held down but not found true by a buffered press check.
- Useful to avoid making a buffered press check return true multiple times by accident
fully_release - call this to make an input released and not found true by a buffered release check.
- Useful to avoid making a buffered release check return true multiple times by accident
Let's also mention the enumerator we added:
INPUT_AXIS - used exclusively with add_gamepad_left_stick or gamepad_right_stick. Stores the direction of a tilt.
And with that, all of the code for our input system is ready to be used! Let's try it out!
/// Create Event
inputManager = new InputManager();

right = inputManager.create_input();
right.add_keyboard_key(vk_right);

up = inputManager.create_input();
up.add_keyboard_key(vk_up);

left = inputManager.create_input()
left.add_keyboard_key(vk_left);

down = inputManager.create_input()
down.add_keyboard_key(vk_down);
In my step event, I can read my inputs:
/// Begin Step Event
inputManager.run();

/// Step Event
// Move right when pressing right!
x += right.check();
// Move left when pressing left!
x -= left.check();
// Move up when pressing up!
y -= up.check();
// Move down when pressing down!
y += down.check();
So you can see here, when we use our code, right.check() acts exactly the same as keyboard_check(vk_right)! If we just stopped here, our system would be functional but wouldn't really have any advantages over regular keyboard checks. So let's do some more!
When we defined our right input, we called add_keyboard_key on it one time. But we can call several add methods on it to add multiple binds. We can even chain them together in a single function call, like so!
right = inputManager.create_input()
        .add_keyboard_key(vk_right)
        .add_keyboard_key(ord("D"))
        .add_gamepad_button(gp_padr)
        .add_gamepad_left_stick(INPUT_AXIS.right);
IMPORTANT NOTE: When chaining, there are no semicolons after our create_input method, or for any chained method except the last one.
Our right key is now going to respond to pressing the right arrow key, the D key, the right D-pad button, and tilting our left stick to the right! And the best part is, we did not have to edit our code that moves us around in the step event AT ALL. We've got full controller support and multiple keybinds going, and we only had to make minimal edits from the previous section! Now we're getting into the power of this setup.
If we want to change the controller that our input system looks for, we can also change the value of inputManager.gamepad at runtime. You can also change deadzone to make the controller more or less sensitive.
The check_pressed method in our input can help with that! Let's try making a buffered jump input that works with a keyboard or a controller. First let's define our jump input:
/// Create Event
inputManager = new InputManager();
jump = inputManager.create_input()
        .add_keyboard_key(vk_space)
        .add_gamepad_button(gp_face1);
And in the step, we'll use check_pressed with a true argument to buffer the check:
/// Begin Step Event
inputManager.run();

/// Step Event
if (jump.check_pressed(true) && place_meeting(x, y + 1, obj_ground)) {
        jump.fully_press(); // fully press the input
        vsp = -jump_power; // jump!
}
With a default buffer value of 5, we can press the jump button up to 5 frames before landing, and it'll still count as a jump input. You may notice that we also call jump.fully_press(); inside our if statement. This prevents jump.check_pressed(true) from being true for more than one frame after running our if statement code.
check_stutter method.
/// Create Event
inputManager = new InputManager();
up = inputManager.create_input()
        .add_keyboard_key(vk_up);
down = inputManager.create_input()
        .add_keyboard_key(vk_down);
For this example let's just use the up and down arrow keys.
/// Begin Step Event
inputManager.run();

/// Step Event
cursor += down.check_stutter(20, 10) - up.check_stutter(20, 10);
With this code, if we press the down arrow key and hold it, cursor will increase by 1 on the first frame that we press the button. If we keep holding the button without letting go, then it will wait 20 frames before increasing by 1 again. After that, it will increase by 1 every 10 frames. Doing this means we can get input that waits a little bit before repeatedly acting over a set interval. Oftentimes the first waiting period is longer than the rest, which is why we have a separate argument for that one. You can pass 0 to the first argument to make every waiting period last the same amount of time.
But for those of you interested in the inner workings, feel free to make any kinds of edits for your own individual input needs.
Related Assets
Browse these game resources from the community
The great Jammening of 2022
A variety of assets made by me, Petra! For gm48 2022 this includes music, and Tiles!
Menus - buttons, sliders, and carousels
A struct based menu system with support for various element types.
Photographic Noise Shader
This shader is intended to approximate the effect of noise in low light photography with a high ISO.
State Machines, the struct-based approach
There's many ways to make a state machine. This approach let's you use structs to manage your states.